Upload Documents
Document-Copilot's upload system is designed for simplicity and efficiency, enabling users to quickly add new files and folders to their knowledge base. Here's a step-by-step explanation of how the upload system works.
How It Works
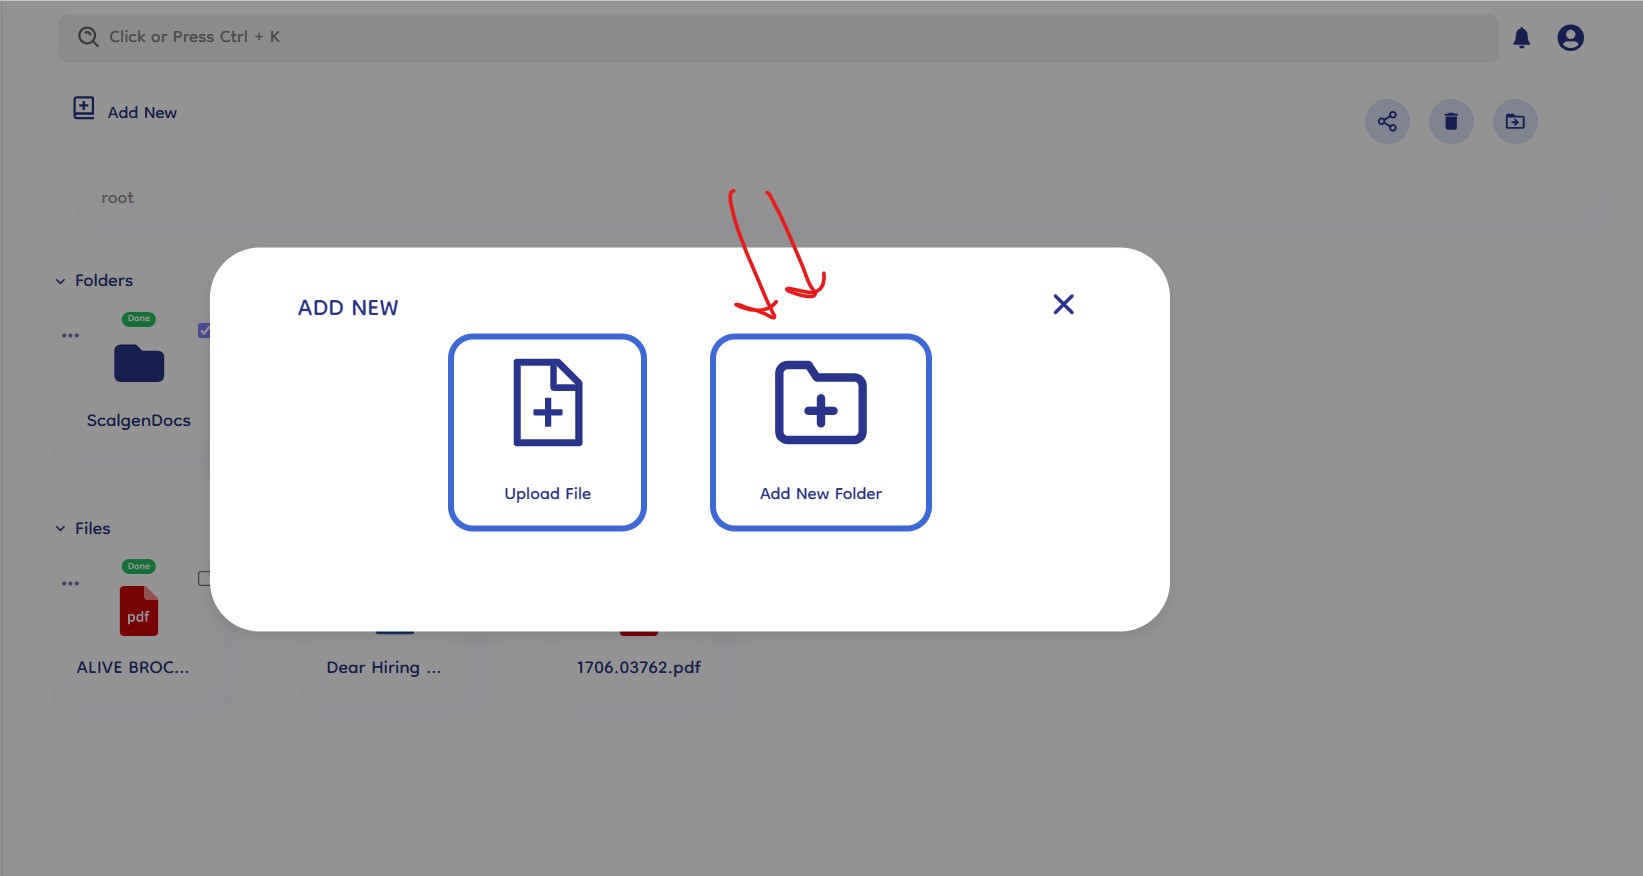
1. Initiate the Upload Process
- Click "Add New" Button: Begin by clicking the "Add New" button located in the main interface. This action will present you with options to either upload files, upload folders or create folders.

2. Upload File
- Select "Upload File" Option: After clicking the "Add New" button, choose the "Upload File" option.
- Choose File: A file selector dialog will appear, allowing you to browse and select the file you wish to upload.
- Drag and Drop: Alternatively, you can drag and drop your file directly into the designated area for a faster upload process.
- Upload Confirmation: Once selected, the file will begin uploading, and you will receive a confirmation once the upload is complete.
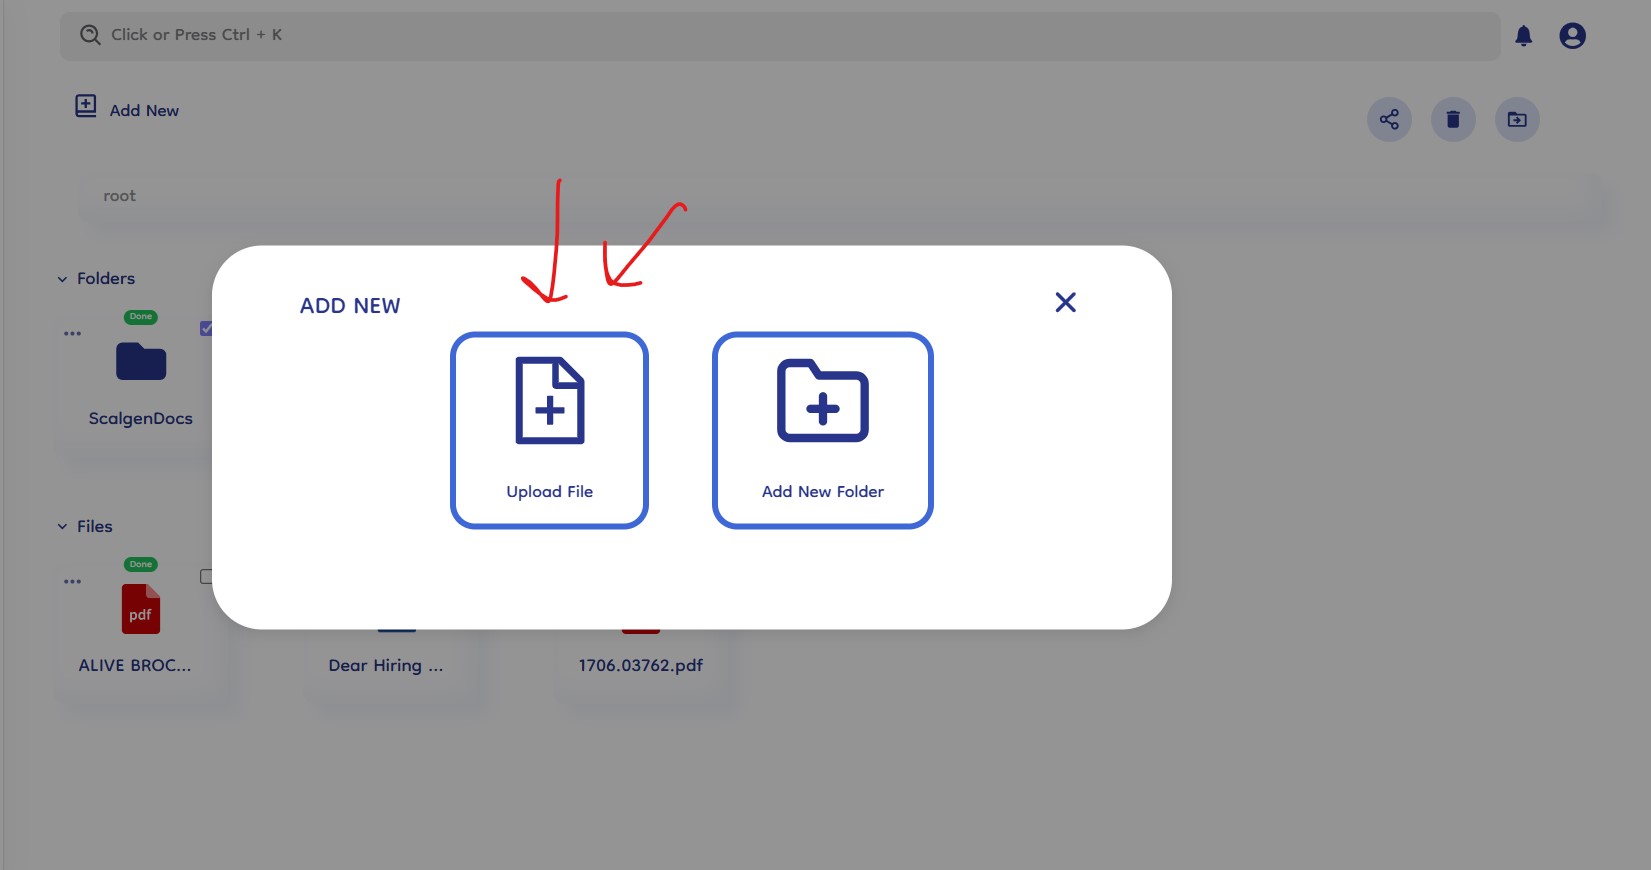
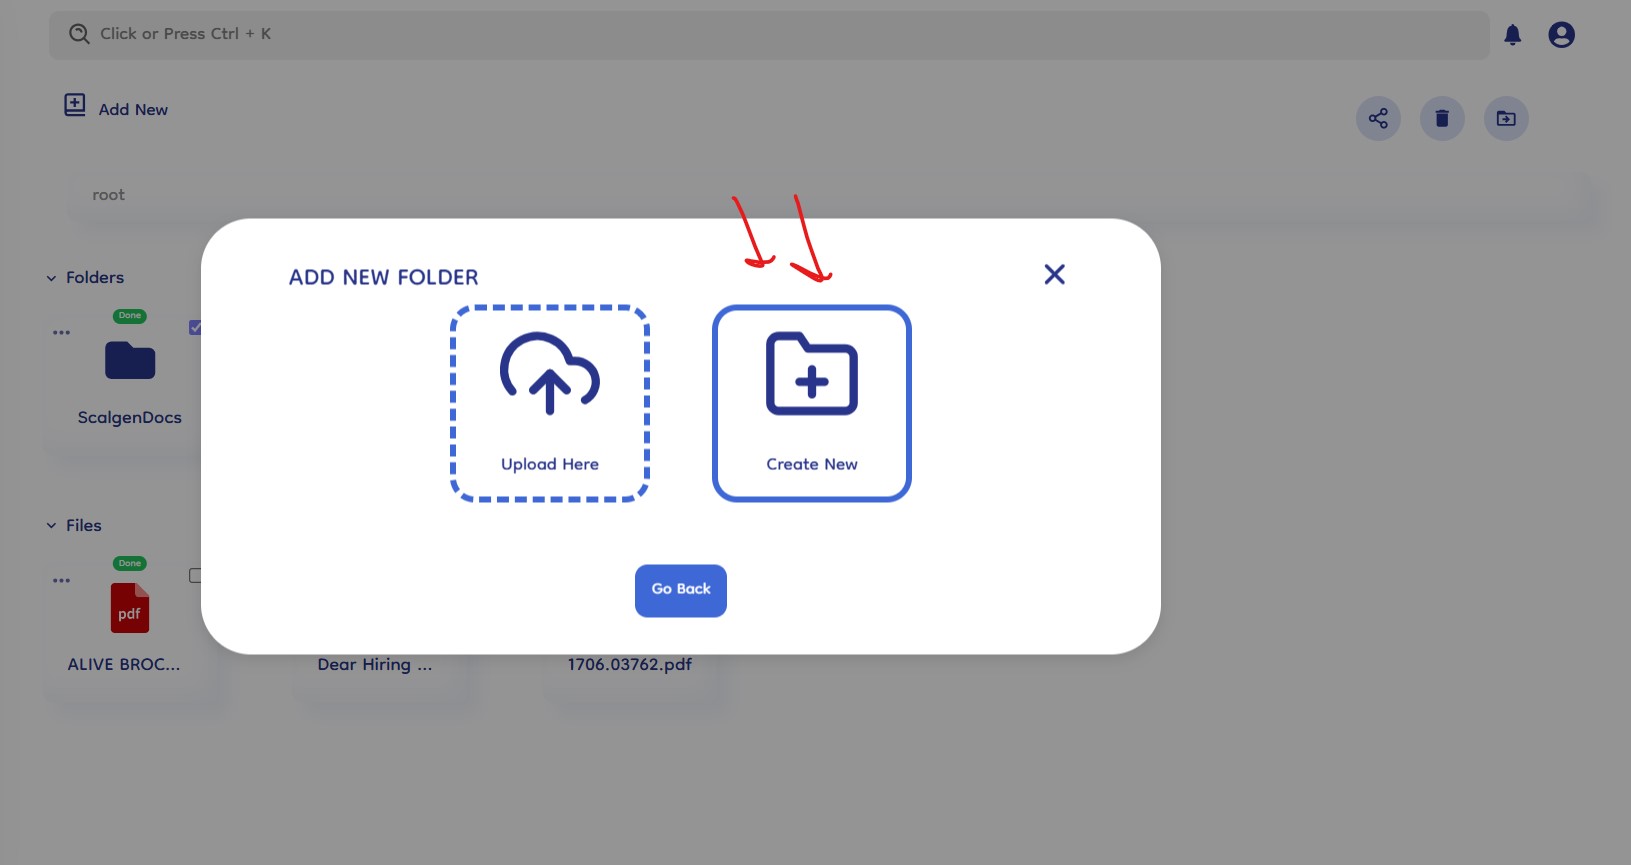
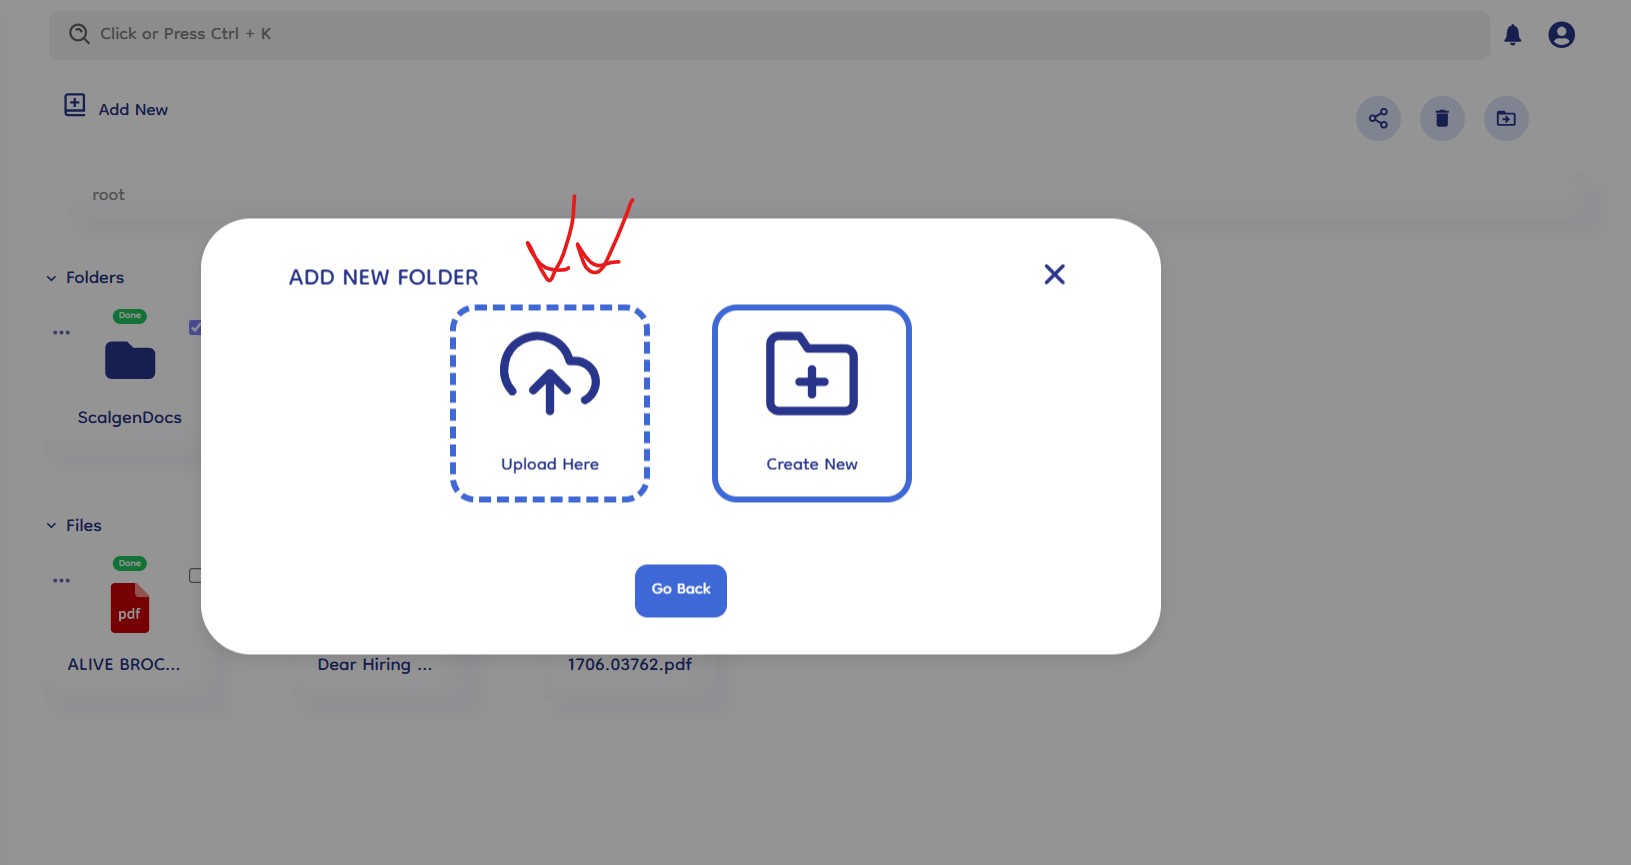
3. Add Folder Section
- Move to Folder Section: If you need to manage folders, click the option to move to the folder section.
- "Add New Folder" Options: In the folder section, you will see two options:
- Upload Folder: Choose this option if you want to upload an entire folder. This maintains the folder's internal structure, including all subfolders and files.
- Create Folder: Select this option to create a new folder from scratch.
4. Upload Folder
- Select "Upload Folder": Choose the "Upload Folder" option within the folder section.
- Browse and Select Folder: A folder selector dialog will appear, allowing you to browse and select the folder you want to upload.
- Maintain Structure: The selected folder, along with its internal structure and contents, will be uploaded to the knowledge base.
- Upload Confirmation: You will receive a confirmation once the folder upload is complete.
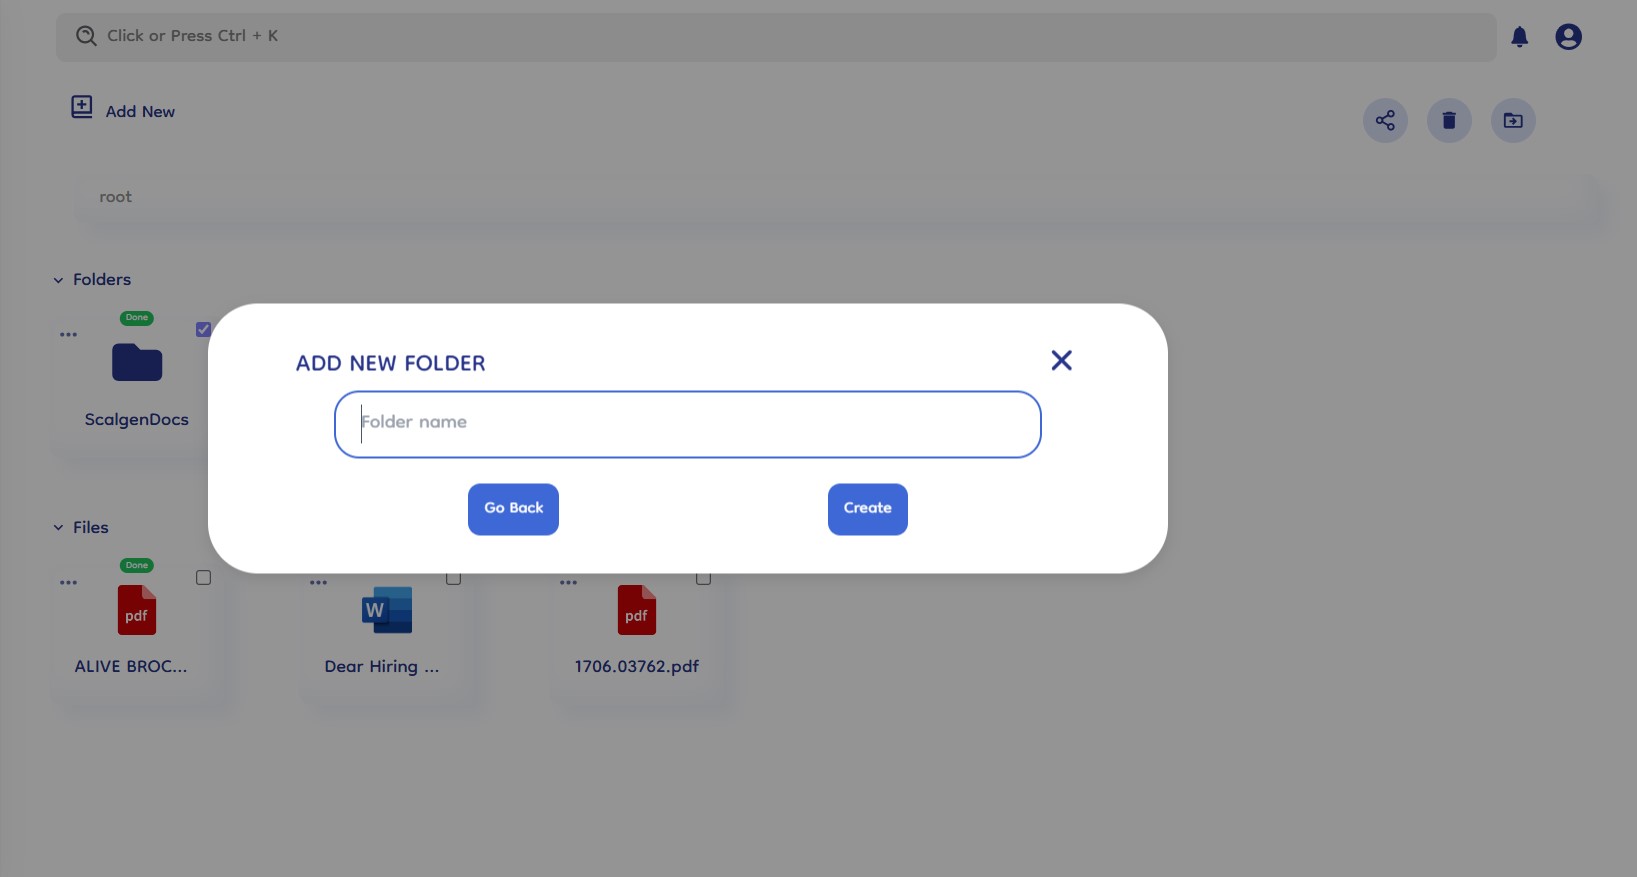
5. Create Folder
-
Select "Create Folder": Choose the "Create Folder" option within the folder section.
-
Name Your Folder: Provide a name for the new folder to reflect its contents.
-
Folder Creation: The new folder will be created instantly, ready for you to move files into or organize further.